Help for Message Center
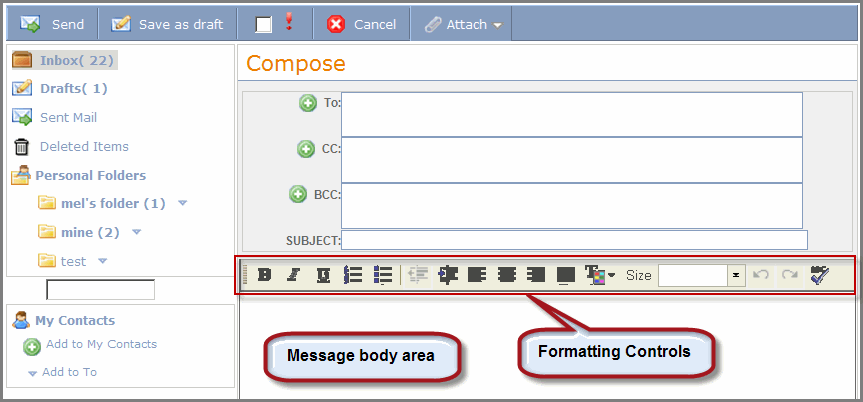
On the toolbar, click Compose. The Compose window displays.

Click the ![]() add icon beside, To:, CC:, or BCC: to display the User
Directory window, where you can search for and select the people or
groups to which you want to send a message.
add icon beside, To:, CC:, or BCC: to display the User
Directory window, where you can search for and select the people or
groups to which you want to send a message.
Type the name (or partial name) of the user or group in the Type in name field.
If you want to restrict your search, click the Include drop-down arrow and select a filtering option from the list. The default selection is All - all users and groups available on your portal will be searched for the data you entered in the Type in name field.
Click Find. The screen refreshes, and the search results display.
Select the check box of each user or group to which you want to send the message.
Click OK. The User Directory window closes and the selections display in your message.
Optional - type the message subject in the SUBJECT field.
Type your message in the main arrow of the window. Use the formatting controls as desired.
Optional - perform any of the following:
attach a file to the message by clicking Attach. Follow the on-screen prompts to attach files stored on My Computer (files available from your PC), or files stored on the Secure File Exchange system.
|
Important: If your organization does not use Covisint Secure File Exchange, the drop-down menu does not display. In that case, click Attach and follow the on-screen prompts to attach files available from your PC. |
mark the message as important by selecting the exclamation point check box.
Click Send.
RESULT:
You have successfully created a message.