Sending a Delivery (Advanced Options)

  1. After logging in to Hypersend, navigate to the Send screen.

    Where are the Advanced sending options?  (At the bottom of the Send screen)


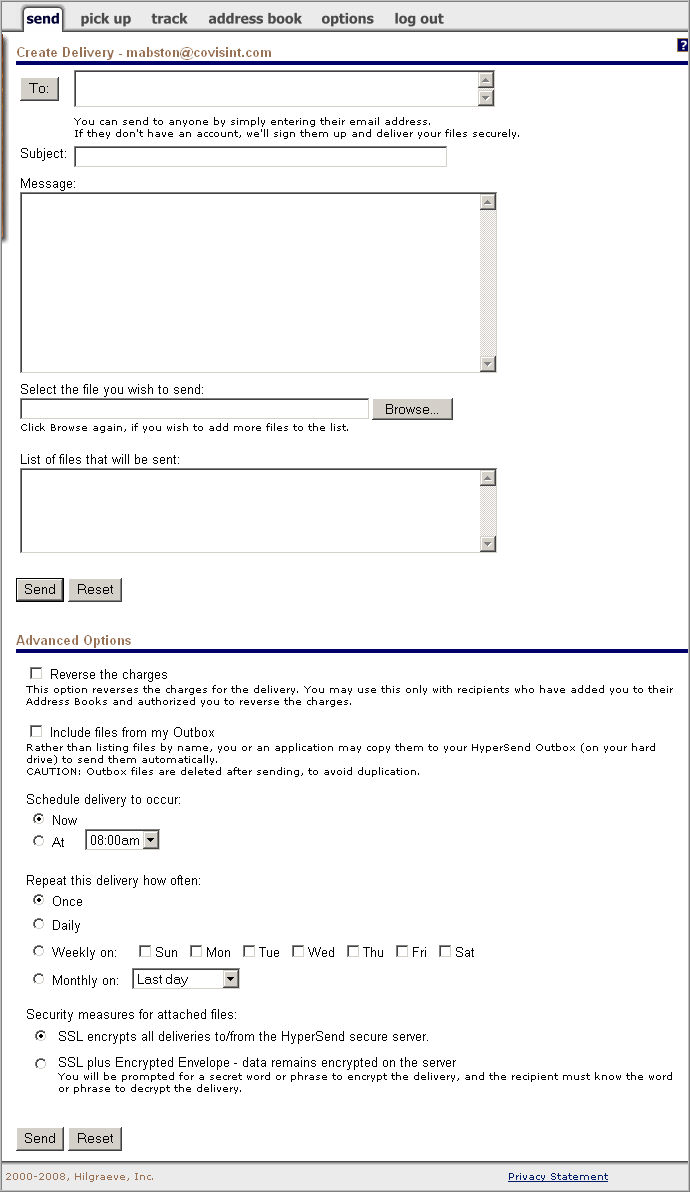
  2. Key in the address of each person you wish to send this delivery, separated by a comma or semi-colon.  (Or, click To and select from addresses if you have already populated the address book).

  3. In the subject field, key in the subject of your file delivery and/or message. This is a required field. This subject line will appear on your Tracking page, on your recipient's Pick up page, and will be stored in your recipient's HyperSend Inbox.

  4. Optionally, key in the text of your message In the message field.

  5. Click Browse and select file you wish to send. The file you have chosen appears in the Files text box and is added to the Send list.

  6. Repeat step 4 to add additional files.   (To remove a file from the list, simply click on the filename in the Send List and then click Delete on your keyboard).

  7. Optionally, enable the Reverse Charges checkbox if you want the recipient charged for the delivery. The number of megabytes and messages in the delivery will be deducted from the recipient's capacity rather than yours. The recipient must have added you to his/her Address book and granted you permission to charge him/her for the delivery.

  8. Optionally, enable the Include files from Outbox   The HyperSend Outbox ("C:\HyperSend outbox" by default), is a 'holding bin.' It can collect files throughout the day and have them ready for uploading. When you choose "Include files from my Outbox," any file placed in this folder by you or an application will be delivered to the recipients in the 'To:' box. The delivery takes place when you hit the Send button, or at the time you have indicated under the Schedule delivery option. Once they have been uploaded to the HyperSend server, the files are deleted from the Outbox. checkbox if you want to send multiple files without having to select and add them one at a time to your send list. Use it with HyperSend's scheduling feature to automatically deliver files to your designated recipients. Or use it as a 'central holding station.' You can place files in the Outbox folder up until the time you want to send the delivery.     Learn more about creating an Outbox...   The HyperSend Outbox ("C:\HyperSend outbox" by default), is a 'holding bin.' It can collect files throughout the day and have them ready for uploading. When you choose "Include files from my Outbox," any file placed in this folder by you or an application will be delivered to the recipients in the 'To:' box. The delivery takes place when you hit the Send button, or at the time you have indicated under the Schedule delivery option. Once they have been uploaded to the HyperSend server, the files are deleted from the Outbox.


    Items in the Send list as well as anything in the HyperSend Outbox are delivered at the time and day you set through these options. If you want a message to accompany the files, enter it in the Message field. HyperSend stores the text as well, and sends the same message each time the delivery takes place.    

 
  1. Enable the radio button to determine the delivery schedule:

    1. Set the time of day you want files to be uploaded to the server. Select your desired time (half hour increments) from the drop-down list.

    2. Repeat this delivery how often:  Choose daily, weekly or monthly. For weekly and monthly deliveries, select the appropriate day.


NOTE: Scheduled deliveries are not uploaded to the server until their appointed time. DO NOT encrypt a scheduled delivery if you are unavailable at the time the delivery is ready to go (e.g., 2:00 a.m.). The Agent prompts you for the password when it uploads the delivery to the server.


  1. Determine security measures by enabling one of the radio buttons:

    1. SSL - Encrypts the delivery to and from the server. HyperSend enforces the Secure Sockets Layer (SSL) protocol which uses various strong encryption techniques to protect data which is transmitted over the Internet. SSL is the protocol used by commerce sites to protect credit card transactions.

    2. SSL plus encrypted envelope - With this option, data is encrypted at every stage of the delivery process. When it is ready to upload the delivery to the server, the Agent pops up a password/confirm password dialog. The secret word or phrase is case-sensitive, must include at least six characters, and cannot contain any spaces. Your recipient will be prompted to enter the word or phrase when his Agent attempts to download the delivery. He must type the password using the same capitalization as you did.


NOTE: Hypersend prompts you for the password at the time the delivery is uploaded to the server. DO NOT encrypt a scheduled delivery if you are unavailable at the scheduled delivery time.   (e.g., 2:00 a.m.).  


  1. Communicate this encryption password with your recipient(s) in a secured manner outside of the HyperSend system.  Ideally, it would be best to exchange the password through some means other than in the delivery's message field.
     

  2. Click Send.


RESULT:

You have successfully sent a delivery using advanced options.


Related Topics